

Over the last ROS has gained a large following and mindshare in the robotics community, both in academia and industry. Its flexibility, ease of use, and wide variety of packages make it great for getting up and running quickly. ROS also has easy integration with the Gazebo simulator making building smart robots even easier.
First Steps with ROS and Gazebo
Despite all my time working in robotics, I hadn’t gotten started with ROS or Gazebo myself until recently. After reading through the excellent ROS documentation, though, I still wasn’t totally certain how to do the following things, as illustrated in the GIF above:
- Load an iRobot Create into a Gazebo world
- Make the Create drive in a circle with
rospy - Launch it all with
roslaunch
I consider these 3 steps a sort of “Hello World” for a robotics simulation and I created the simple_create repository as an example. I’ll cover a few of the pieces here in more detail.
package.xml
This package only needs depend on rospy and std_msgs, both at build and runtime. rospy lets us write the robot’s controller in Python and std_msgs contains the messages we need to drive the robot, such as the geometry_msgs/Twist message.
launch/create_world.launch
The launch file configures the execution of both Gazebo and the node that drives the Create. Here it is in its entirety:
<launch>
  <!-- We resume the logic in empty_world.launch, changing only the name of the world to be launched -->
  <include file="$(find gazebo_ros)/launch/empty_world.launch">
    <!-- Because the world path is relative to GAZEBO_RESOURCE_PATH, we append to it here. -->
    <env name="GAZEBO_RESOURCE_PATH" value="$(env GAZEBO_RESOURCE_PATH):$(find simple_create)"/>
    <arg name="world_name" value="worlds/create.world"/>
    <arg name="paused" value="false"/>
    <arg name="use_sim_time" value="true"/>
    <arg name="gui" value="true"/>
    <arg name="headless" value="false"/>
    <arg name="debug" value="false"/>
  </include>
  <node name="publisher" pkg="simple_create" type="circle.py" required="true" />
</launch>
The first block in the launch file is the <include> tag where we inherit the empty_world.launch file from gazebo_ros and override the arguments we need.
Next up the <env> tag sets an environment variable to a particular value. In this case, we’re appending the simple_create package’s path to the GAZEBO_RESOURCE_PATH. This is required for the world file to be found by Gazebo.
<env name="GAZEBO_RESOURCE_PATH" value="$(env GAZEBO_RESOURCE_PATH):$(find simple_create)"/>
Each <arg> tag has a different command line argument for Gazebo. The world_name argument, as expected, contains the path to the world file that specifies the scene.
<arg name="world_name" value="worlds/create.world"/>
The final line of interest in our launch file creates the node we use to drive the Create:
<node name="publisher" pkg="simple_create" type="circle.py" required="true" />
This tag launches the circle.py program from the “simple_create” package, names it “publisher” and, using required="true", fails the whole launch if it is unable to launch. A bit later on we’ll investigate circle.py and see how it drives the Create.
worlds/create.world
The world file (see the whole thing here) is our definition of the “world”, aka everything in our simulation. It’s written in SDF (an XML schema) and specifies a single world, which is composed of a light source (model://sun), a ground plane (model://ground_plane), and the robot.
The robot tag here is the most interesting part, so let’s look at it in detail.
    <model name="simple_create">
        <include>
	        <uri>model://create</uri>
        </include>
Here we name the model “simple_create” so that it’s unique in our scene, then an add an <include> tag to inherit from the base Create model attributes. These attributes are accessible through the create:: namespace.
The final portion of our simple_create model is the addition of a differential_drive_controller plugin. This plugin allows us to send velocity commands to the Create model inside Gazebo.
Let’s look at the more nuanced parts of this <plugin> block:
The joint specification tags connect the diff drive plugin to the joints which will move our robot. What’s important to note here is the create:: namespace, derived from the Create’s name="create" tag inside the create.model file.
	<leftJoint>create::right_wheel</leftJoint>
	<rightJoint>create::left_wheel</rightJoint>
The final lines of interest here are the topic tags. These configure where we’ll send/receive messages in ROS about our Create running in Gazebo.
	<commandTopic>cmd_vel</commandTopic>
	<odometryTopic>odom</odometryTopic>
So if we want to send a velocity message to our Create, we’ll publish it on the simple_create/cmd_vel channel and if we want to listen to the Create’s odometry updates, we’ll subscribe to simple_create/odom.
src/circle.py
circle.py is the brains of this operation. Our launch file above defined a <node> that starts circle.py as a part of our launch graph.
Here’s the entire file:
#!/usr/bin/env python
import rospy
from geometry_msgs.msg import Twist

def main():
    pub = rospy.Publisher('simple_create/cmd_vel', Twist, queue_size=10)
    rospy.init_node('circler', anonymous=True)

    rate = rospy.Rate(2) # 2hz
    msg = Twist()
    msg.linear.x = 0
    msg.angular.z = 3

    while not rospy.is_shutdown():
        msg.linear.x += .2
        pub.publish(msg)
        rate.sleep()

if __name__ == '__main__':
    try:
        main()
    except rospy.ROSInterruptException:
        pass
The top of this file is common to most Python scripts. We add a shebang to specify the interpeter to use, then add our necessary imports. Here we import rospy, the Python module of common ROS operations, and the Twist message from geometry_msgs.
#!/usr/bin/env python
import rospy
from geometry_msgs.msg import Twist
The meat of our node is in the main function. We’ll break this down into parts. First we create a publisher using rospy.Publisher that will use the simple_create/cmd_vel topic that, as we configured in the world file, is the topic our differential drive plugin is listening on for velocity update messages.
def main():
    pub = rospy.Publisher('simple_create/cmd_vel', Twist, queue_size=10)
Next we initialize ourselves as a node in the ROS graph. Required for interacting with other ROS nodes.
rospy.init_node('circler', anonymous=True)
Now we come to the setup for our driving code. We create a rospy.Rate object to allow us to reliably send velocity estimates at a fixed rate. We also initialize a Twist message with some default velocity values. These values set forward motion (linear along x-axis) to zero and yaw velocity (angular around the z-axis) to 3 radians / second.
    rate = rospy.Rate(2) # 2hz
    msg = Twist()
    msg.linear.x = 0
    msg.angular.z = 3
The core of our node is the following while loop. Each iteration it checks for a notification from rospy to exit, increases our forward velocity, publishes on the simple_create/cmd_vel topic, and then uses the Rate object to sleep until we want to publish another velocity update.
    while not rospy.is_shutdown():
        msg.linear.x += .2
        pub.publish(msg)
        rate.sleep()
And the last part of file includes the commond __name__ == '__main__' check, so that our node may be either an executable, such as when it’s a ROS node, or included as a reusable module in unit tests. We also wrap the entire function call in a ROSInterruptException try-catch, in the case that ROS exits before we call some ROS function. This keeps us from exiting as a failure and instead allows us to quietly exit as expected.
if __name__ == '__main__':
    try:
        main()
    except rospy.ROSInterruptException:
        pass
Running simple_create
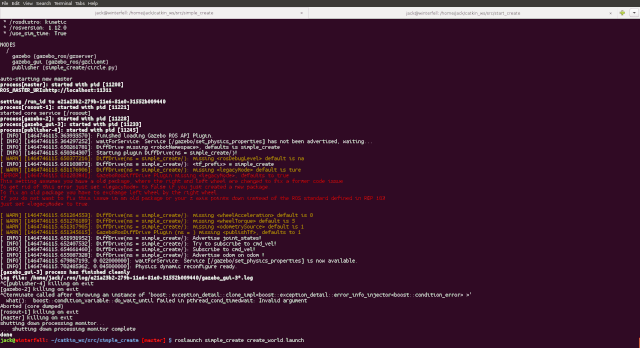
First, clone simple_create into the src/ directory of your Catkin workspace. Then rebuild your workspace with catkin_make and launch using roslaunch simple_create create_world.launch. If you’ve setup and sourced your ROS and Gazebo environments, this should start the Gazebo GUI and drive your Create in a spiral around your ground plane world.
Troubleshooting
Be sure to source both the /opt/ros/<ros-version>/setup.bash and /usr/share/gazebo/setup.sh (or your distro’s equivalent) files before calling roslaunch.
Additionally, make sure to add the src directory of your Catkin workspace to ROS’ package path. This way ROS can find our simple_create package for launching.
export ROS_PACKAGE_PATH=$ROS_PACKAGE_PATH:<catkin-workspace>/src